重走Ajax之路(一)
复习篇。现在做的项目请求这块都是用的axios,但是还是不能忘本。
Ajax:Asynchronous JavaScript+XML(异步 JavaScript+XML)的技术。它可以向服务器请求数据,而不刷新页面,即能够局部刷新,可以让用户有更好的用户体验。
插一嘴:Ajax 名字中包含 XML,但是这并不意味着并不代表格式一定是XML。实际上,感觉JSON更香。
Ajax 使用步骤(异步)
Ajax 的使用主要分为 4 步。
1. 创建 XHR 对象
AJAX 的关键就是XMLHttpRequest对象(XHR对象)。所以第一步,首先就是创建XHR对象。
1
| const xhr = new XMLHttpRequest();
|
2. 调用 open 方法
调用open方法启动请求,准备发送。这时候并不会发送请求,而只是启动一个请求
open方法接收 3 个参数:请求类型、请求 URL、请求是否异步(默认为true,表示异步执行)
1
| xhr.open("get", "example.txt", true);
|
3. 调用 send 方法
发送请求需要调用send方法,调用 send 之后,请求就会发送到服务器。接收一个参数,是作为请求体发送的数据。默认值为null
那么,问题来了:如果我们请求体没有数据,我们能不能不调用send方法?
不能,我们上面已经说过了,调用open方法只是启动一个请求,并不会发送请求。调用send方法才会发送请求,所以不调用send方法,就相当于发送请求的准备都做好了,但是就是不发请求。
4. 绑定 readystatechange 事件
XHR 对象会有一个readyState属性,这个属性表示当前处于请求响应过程的哪个阶段
- 0(未初始化):还没有调用
open方法
- 1(已打开):已经调用
open方法,还没调用send方法
- 2(已发送):已经调用
send方法,还没有收到响应
- 3(接收中):已经接收到部分响应了
- 4(完成):已经接收到全部的响应了
实际上,我们这里只需要状态为 4 的,即已经接收到全部响应了。
1
2
3
4
5
6
| xhr.onreadystatechange = function () {
console.log(xhr.readyState);
if (xhr.readyState === 4) {
}
};
|
当收到响应后,XHR 对象的以下属性也会有对应数据。
status:相应的 HTTP 描述statusText:响应的 HTTP 状态描述responseText:响应体文本
1
2
3
4
5
6
7
8
| xhr.onreadystatechange = function () {
if (xhr.readyState === 4) {
if ((xhr.status >= 200 && xhr.status < 300) || xhr.status === 304) {
console.log(xhr.responseText);
}
}
};
|
4. 绑定 load 事件
上面我们用的是绑定readystatechanges事件,再通过判断readyState属性为 4 来判断响应是否接收完成。
这时候,也可以给XHR对象绑定load事件,来简化一点。load事件在响应接收完成后立即触发,所以我们就不再需要检查readyState属性了。
1
2
3
4
5
| xhr.onload = function () {
if ((xhr.status >= 200 && xhr.status < 300) || xhr.status === 304) {
console.log(xhr.responseText);
}
};
|
完整代码
1
2
3
4
5
6
7
8
9
10
11
12
13
14
15
16
17
18
19
20
21
22
23
24
25
26
27
28
| <body>
<button id="btn">获取信息</button>
<script>
const btn = document.getElementById('btn')
btn.addEventListener('click', fetchData)
function fetchData() {
const xhr = new XMLHttpRequest()
xhr.open('get', 'http://localhost:8088')
xhr.send(null)
xhr.onreadystatechange = function () {
if (xhr.readyState === 4) {
if ((xhr.status >= 200 && xhr.status < 300) || xhr.status === 304) {
console.log(xhr.responseText)
}
}
}
}
</script>
</body>
|
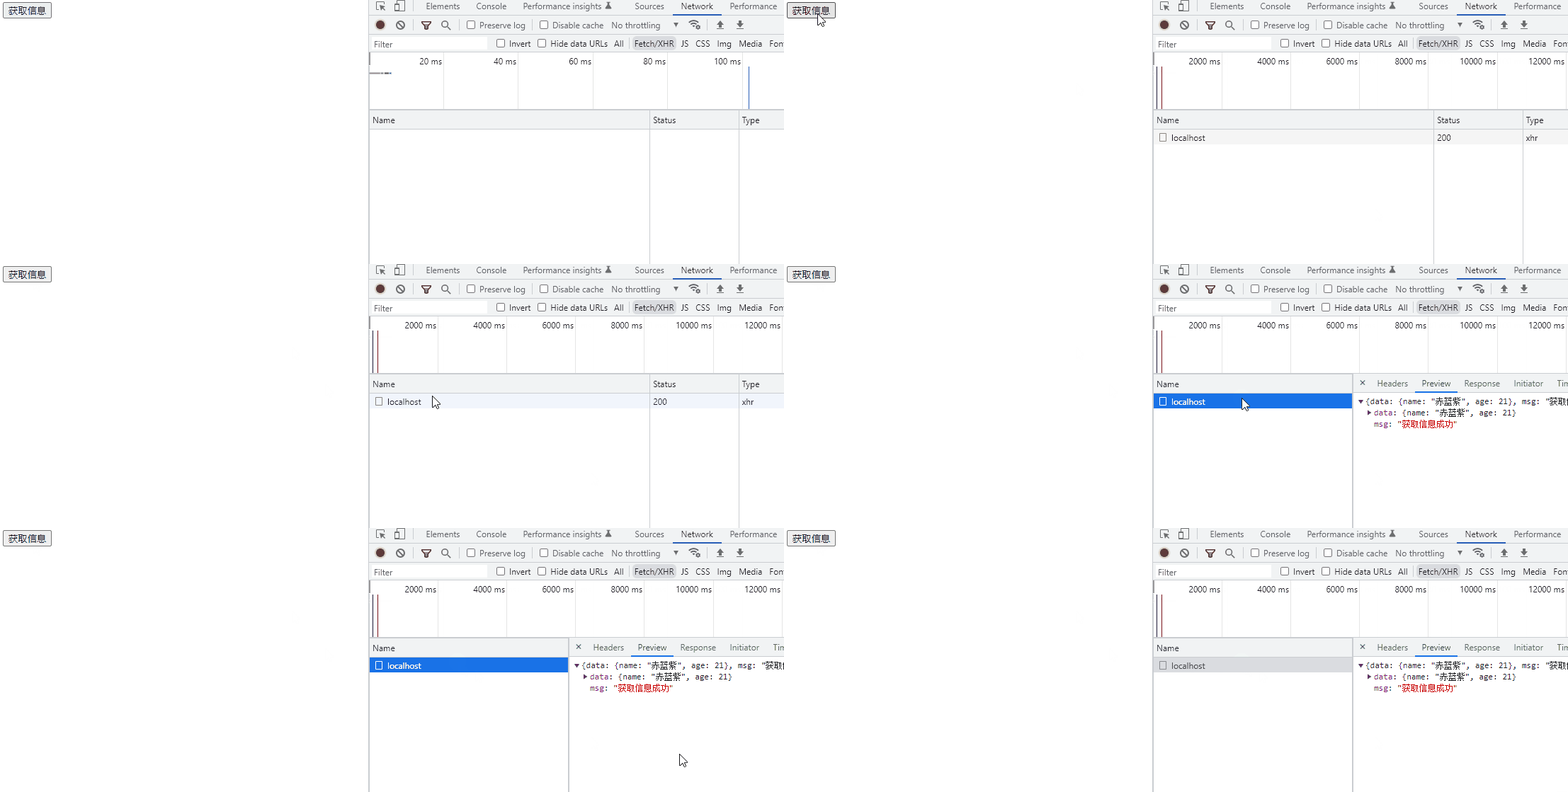
最终效果: 有后端接口实验效果更好

附赠:测试用express(有需要自取)
如果想简单学习下express,可以访问本人的博客网站。
1
2
3
4
5
6
7
8
9
10
11
12
13
14
15
16
17
18
19
20
21
22
23
24
25
| const express = require("express");
const cors = require("cors");
const app = express();
app.use(cors());
app.get("/", function (req, res) {
res.header("token", "123456");
res.header("Access-Control-Expose-Headers", "token");
res.status(200).json({
data: {
name: "赤蓝紫",
age: 21,
},
msg: "获取信息成功",
});
});
app.listen(8088, () => {
console.error("http://localhost:8088");
});
|


