Github Actions实现每日图片
首先,直接去konachan官网看它的api,可以通过https://konachan.net/post.json获取图片信息,并且如果添加参数?tags=order%3Arandom则会随机获取。
使用puppeteer连接接口
puppeteer的语法不会细致讲解,有兴趣的自己去查,或者看之前分享的一篇puppeteer小体验。
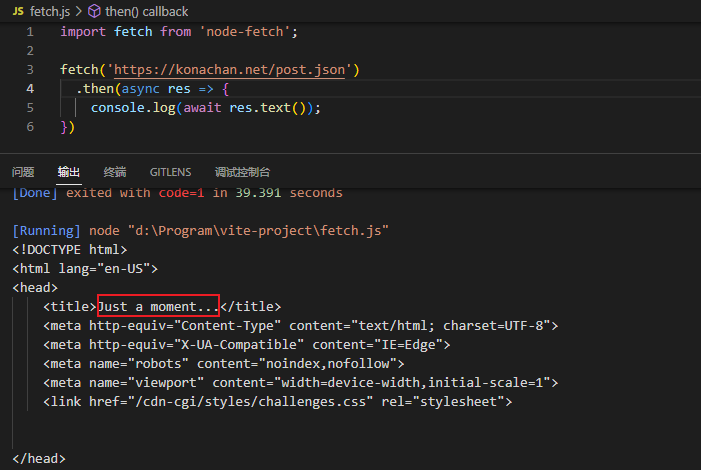
这里使用puppeteer是因为如果直接用http模块或者fetch都会得到一个Just a moment的结果,需要进行验证。这个验证也是可以通过添加代理的方式来跳过,但是添加代理的方式后面在分享。用puppeteer捣鼓了好久,不记录一下的话就太浪费了。

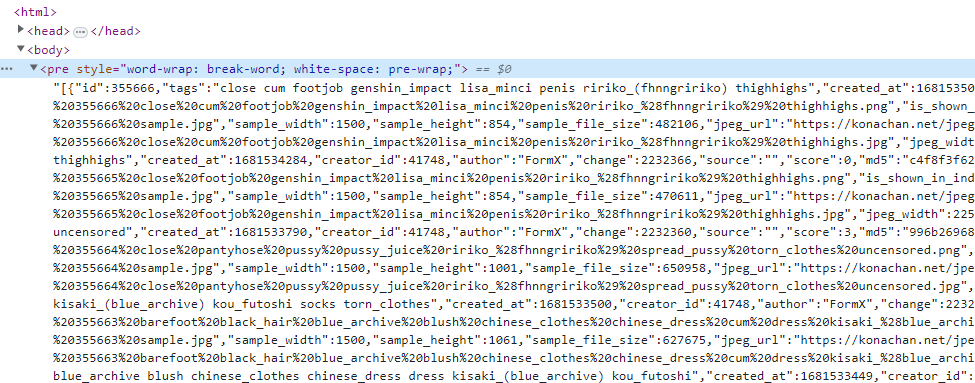
我们想要获取到图片信息的话,只需要获取下面的pre标签的内容。

1
2
3
4
5
6
7
8
9
10
11
12
13
14
15
16
17
18
19
20
21
22
23
24
25
26
27
| import puppeteer from 'puppeteer';
import fs from 'fs';
let imgSource = 'https://konachan.net/post.json';
(async () => {
const browser = await puppeteer.launch();
const [page] = await browser.pages();
await page.goto(`${imgSource}?tags=order%3Arandom`);
const preSelector = await page.waitForSelector('pre');
const text = await preSelector.evaluate(el => el.textContent);
const imgs = JSON.parse(text)
.filter(item => item.rating === 's' && item.file_url)
.map(item => {
return {
tags: item.tags,
url: item.file_url
}
});
console.log(imgs[1]);
await browser.close();
})();
|

接下来去请求图片,并将图片保存就行。这里有个巧妙的点:konachan国内是可以直接访问的,如果我们直接用node请求图片是能拿到图片的,不需要验证。
1
2
3
4
5
6
7
| for (const img of imgs) {
const res = await fetch(img.url);
const filename = +new Date() + path.extname(img.url);
const writeStream = fs.createWriteStream(`./img/${filename}`);
res.body.pipe(writeStream);
}
|
上面使用的是node-fetch。
效果:

完整代码
1
2
3
4
5
6
7
8
9
10
11
12
13
14
15
16
17
18
19
20
21
22
23
24
25
26
27
28
29
30
31
32
33
34
35
36
37
| import puppeteer from 'puppeteer';
import fs from 'fs';
import path from 'path';
import fetch from 'node-fetch';
let imgSource = 'https://konachan.net/post.json';
(async () => {
const browser = await puppeteer.launch();
const [page] = await browser.pages();
await page.goto(`${imgSource}?tags=order%3Arandom`);
const preSelector = await page.waitForSelector('pre');
const text = await preSelector.evaluate(el => el.textContent);
const imgs = JSON.parse(text)
.filter(item => item.rating === 's' && item.file_url)
.map(item => {
return {
tags: item.tags,
url: item.file_url
}
});
for (const img of imgs) {
const res = await fetch(img.url);
const filename = +new Date() + path.extname(img.url);
const writeStream = fs.createWriteStream(`./img/${filename}`);
res.body.pipe(writeStream);
}
await browser.close();
})();
|
原生fetch版本
node18之后内置了fetch,但是它的使用和node-fetch稍微不太一样,我们需要使用res.blob()得到blob对象,然后再将blob对象转换成buffer,最后再将buffer作为fs.writeFile的参数进行图片的保存。
1
2
3
4
5
6
7
8
9
10
| for (const img of imgs) {
const res = await fetch(img.url);
const blob = await res.blob();
const arrayBuffer = await blob.arrayBuffer();
const buffer = new Uint8Array(arrayBuffer);
const filename = +new Date() + path.extname(img.url);
fs.writeFileSync(`./img/${filename}`, buffer);
}
|
可以看到上面转了好多次,显示将请求转成blob对象,然后在转成arrayBuffer,最后转成的Uint8Array就是能直接作为writeFile方法参数的。
Buffer对象继承自Uint8Array。
1
2
3
4
5
6
| const u8 = new Uint8Array([1, 2, 3, 4, 5, 6]);
const buffer = Buffer.from([1, 2, 3, 4, 5]);
console.log(buffer instanceof Buffer);
console.log(buffer instanceof Uint8Array);
console.log(u8 instanceof Buffer);
|
可科学版
上面的方式能实现是因为konachan没有被qiang,那么如果被qiang了的情况就可以使用puppeteer的evaluate方法来实现在浏览器中发送请求。
1
2
3
4
5
6
7
8
9
10
11
12
13
14
15
16
17
| await page.exposeFunction('saveFile', async (data, filename) => {
fs.writeFileSync(`./img/${filename}`, data);
})
for (const img of imgs) {
const filename = +new Date() + path.extname(img.url);
await page.evaluate(async (imgUrl, filename) => {
const res = await fetch(imgUrl);
const blob = await res.blob();
const arrayBuffer = await blob.arrayBuffer();
const data = new Uint8Array(arrayBuffer);
window.saveFile(data, filename);
}, img.url, filename);
}
|
上面的evaluate就是可以将一些node的数据传给浏览器环境中,然后又通过page.exposeFunction暴露的方法把浏览器中的一些数据重新给到node端。但是只有可被JSON序列化的数据才可以,所以就没法传有方法的一些对象等。
而上面的代码执行并不会保存图片就是因为Uint8Array对象序列化后就不再是Uint8Array对象了。会变成下图的形式。

所以需要重新将它变回Uint8Array。解决方案也很简单,给data对象添加一个length属性,让它变成类数组对象,然后在转换成数组,再通过Uint8Array构造函数生成即可。
1
2
3
4
5
6
7
8
9
10
11
12
13
14
15
16
17
18
19
| await page.exposeFunction('saveFile', async (data, length, filename) => {
data.length = length;
const buffer = new Uint8Array(Array.from(data));
fs.writeFileSync(`./img/${filename}`, buffer);
})
for (const img of imgs) {
const filename = +new Date() + path.extname(img.url);
await page.evaluate(async (imgUrl, filename) => {
const res = await fetch(imgUrl);
const blob = await res.blob();
const arrayBuffer = await blob.arrayBuffer();
const data = new Uint8Array(arrayBuffer);
window.saveFile(data, data.length, filename);
}, img.url, filename);
}
|
完整代码
1
2
3
4
5
6
7
8
9
10
11
12
13
14
15
16
17
18
19
20
21
22
23
24
25
26
27
28
29
30
31
32
33
34
35
36
37
38
39
40
41
42
43
44
45
46
47
48
49
| import puppeteer from 'puppeteer';
import fs from 'fs';
import path from 'path';
let imgSource = 'https://konachan.net/post.json';
(async () => {
const browser = await puppeteer.launch();
const [page] = await browser.pages();
await page.goto(`${imgSource}?tags=order%3Arandom`);
const preSelector = await page.waitForSelector('pre');
const text = await preSelector.evaluate(el => el.textContent);
const imgs = JSON.parse(text)
.filter(item => item.rating === 's' && item.file_url)
.map(item => {
return {
tags: item.tags,
url: item.file_url
}
});
await page.exposeFunction('saveFile', async (data, length, filename) => {
data.length = length;
const buffer = new Uint8Array(Array.from(data));
fs.writeFileSync(`./img/${filename}`, buffer);
})
for (const img of imgs) {
const filename = +new Date() + path.extname(img.url);
await page.evaluate(async (imgUrl, filename) => {
const res = await fetch(imgUrl);
const blob = await res.blob();
const arrayBuffer = await blob.arrayBuffer();
const data = new Uint8Array(arrayBuffer);
window.saveFile(data, data.length, filename);
}, img.url, filename);
}
await browser.close();
})();
|
使用代理解决跨域版本
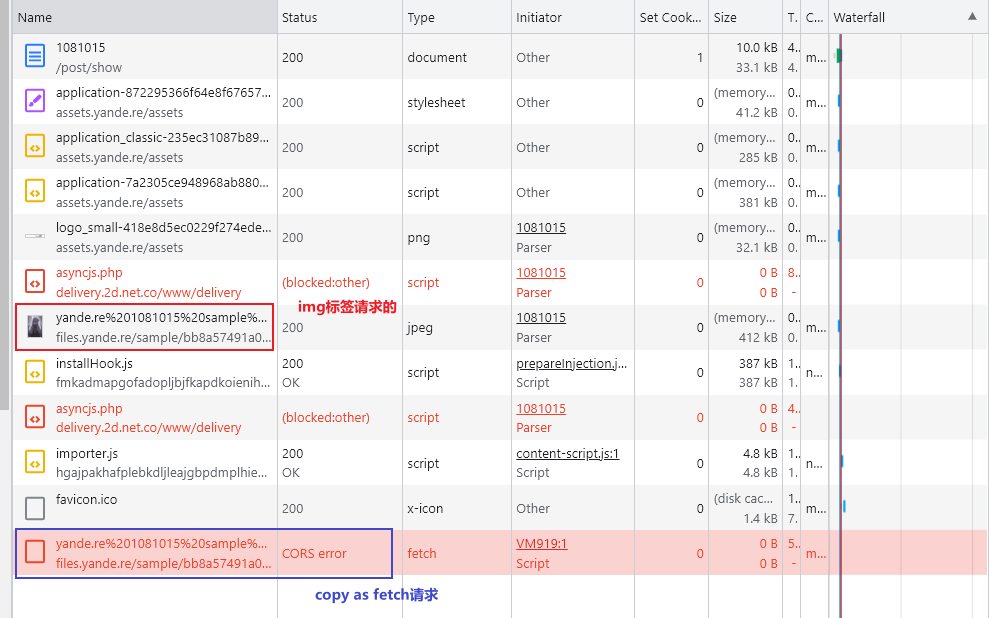
上面使用fetch版本的遇到被qiang的图站就会没法访问,而使用page.evaluate版本的则是有可能会因为图片是二级域名,而主站是一级域名而出现跨域问题。验证的方式就是在Network控制板进行copy as fetch操作,并在控制台运行。如果是图片是二级域名,就会出现跨域问题。
img标签不存在跨域问题,但是copy as fetch后就有可能会有跨域问题。

解决方案就是直接用node脚本访问,因为跨域是因为浏览器的同源政策导致的,那如果不用到浏览器就没有这个问题。但是,有可能会遇到科学问题,所以需要给代码上上代理,详情可查看之前的博客。(顺带一提,上代理之后连验证的过程都会去掉,越来越觉得国内的qiang太强了)
基本没啥技巧,就只是用'socks-proxy-age库而已。
1
2
3
4
5
6
7
8
9
10
11
12
13
14
15
16
17
18
19
20
21
22
23
24
25
26
27
28
29
30
31
32
33
34
35
36
37
38
| import fs from 'fs';
import fetch from 'node-fetch';
import path from 'path';
import { SocksProxyAgent } from 'socks-proxy-agent';
const proxy = 'socks://127.0.0.1:10808';
const agent = new SocksProxyAgent(proxy);
const imgSource = 'https://yande.re/post.json';
(async () => {
const res = await fetch(`${imgSource}?tags=order%3Arandom`, {
agent
});
const text = await res.text();
const imgs = JSON.parse(text)
.filter(item => item.rating === 's' && item.file_url)
.map(item => {
return {
tags: item.tags,
url: item.file_url
}
});
for (const img of imgs) {
const filename = +new Date() + path.extname(img.url);
console.log(filename);
const imgRes = await fetch(img.url, {
agent
});
const writeStream = fs.createWriteStream(`./img/${filename}`);
imgRes.body.pipe(writeStream);
}
})();
|
上面这个方式执行需要有本地有安装v2ray,并且端口是10808才行。但是每日图片打算采用的是Github Actions来实现,那用的就是Github提供的虚拟机。坏处时不能用代理,好处是它的虚拟机本来就已经在qiang外了,那就没必要翻出去。
具体方案就是,Github Actions执行写的脚本,在虚拟机里存储图片,再将图片推到build分支(随便用的),还得生成一个html文件,里面的内容就是多个img标签。地址就是https://raw.githubusercontent.com/用户名/仓库名/分支名在加上文件名的形式来访问。(没有服务器,只能借用github了)
用第三方Actionsgithub-pages-deploy-action来将图片推到build分支,这样子会只保留一次的图片,这样就不会导致仓库大小太大了。
完整代码(无代理版本)
index.js
1
2
3
4
5
6
7
8
9
10
11
12
13
14
15
16
17
18
19
20
21
22
23
24
25
26
27
28
29
30
31
32
33
34
35
36
37
38
39
40
41
42
43
44
45
46
47
48
49
50
51
52
53
54
| import fs from 'fs';
import fetch from 'node-fetch';
const slot = '{{clz}}';
const templateStr = `
<!DOCTYPE html>
<html lang="en">
<head>
<title>二次元</title>
<style>
img {
width: 100%;
}
</style>
</head>
<body>
<div class="container">
${slot}
</div>
</body>
</html>
`;
const imgUrlPrefix = 'https://www.clzczh.top/diary-animate-image';
const imgSource = 'https://yande.re/post.json';
(async () => {
const res = await fetch(`${imgSource}?tags=order%3Arandom`);
const texts = await res.text();
const imgs = JSON.parse(texts)
.filter(item => item.rating === 's' && item.file_url)
.map(item => {
return {
tags: item.tags,
url: item.file_url
}
});
let imgDomStr = '';
for (const img of imgs) {
const filename = +new Date() + img.url.slice(img.url.lastIndexOf('.'));
imgDomStr += `<img src="${imgUrlPrefix}/${filename}" alt="${img.tags}" title="${img.tags}" />`;
const imgRes = await fetch(img.url);
const writeStream = fs.createWriteStream(`./img/${filename}`);
imgRes.body.pipe(writeStream);
}
const htmlStr = templateStr.replace(slot, imgDomStr);
fs.writeFileSync('./result.html', htmlStr);
})();
|
workflow
1
2
3
4
5
6
7
8
9
10
11
12
13
14
15
16
17
18
19
20
21
22
23
24
25
26
27
28
29
30
31
32
33
34
35
36
37
38
| name: 'Image Bot'
on:
workflow_dispatch:
push:
schedule:
- cron: '0 14 * * *'
jobs:
bot:
runs-on: ubuntu-latest
steps:
- name: 'Checkout'
uses: actions/checkout@v3
- name: 'GET Images'
run: |
mkdir img
npm install
node ./index.js
- name: 'Get Date'
run: |
echo "REPORT_DATE=$(TZ='Asia/Shanghai' date '+%Y-%m-%d %T')" >> $GITHUB_ENV
- name: 'Send mail'
uses: dawidd6/action-send-mail@master
with:
server_address: smtp.gmail.com
server_port: 465
secure: true
username: ${{secrets.MAIL_USERNAME}}
password: ${{secrets.MAIL_PASSWORD}}
subject: 每日图片(${{env.REPORT_DATE}})
to: ${{secrets.MAIL_RECEIVER}}
from: CLZ
html_body: file://result.html
- name: Deploy
uses: JamesIves/github-pages-deploy-action@v4
with:
branch: build
folder: img
|
图片的前缀imgUrlPrefix是xxx.top/xxx是因为我将部署后提交到的build分支开启了github page服务,并且设置了自定义域名。详细内容可以自行上网查询,挺多教程
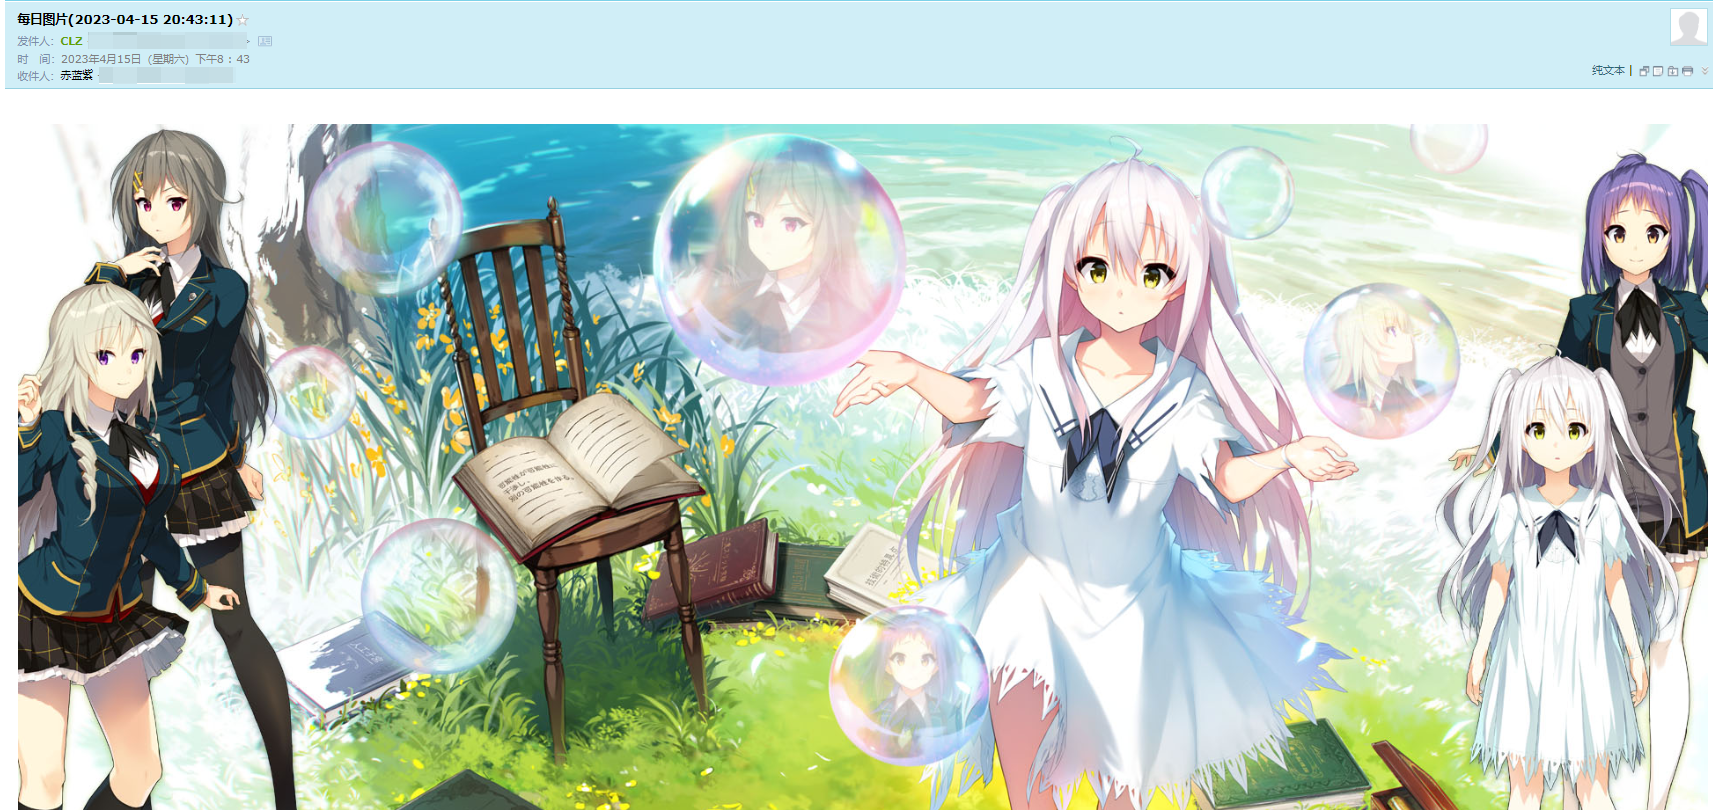
效果(这一次是手动推上去触发的,所以时间不是设定的时间)


